My New Project :) FINAL BLOG INSTALLMENT ADDED

Nieuwe creaties en andere bezienswaardigheden

Moderators: Goos, Woody, Teevee

Gebruikersavatar
RatBikerNate
Bezoek Rat
Bezoek Rat
Berichten: 7
Lid geworden op: vr mei 23, 2008 2:13 pm

My New Project :) FINAL BLOG INSTALLMENT ADDED

Bericht door RatBikerNate » do jul 16, 2009 10:53 am

Hello, thought I'd do a bit of a blog on my latest creation hope you enjoy it:)

I'll be posting this on a load of different forums so it'll probably have stuff in that you've seen or read before.

I'll try to make it as interesting/informative as I can so if you enjoy it leave a comment :)

Ok lets get started then, a couple'o months ago I had the sudden realisation that I own two running bikes both of which break down and both of which are IMPOSSIBLE to get cheap or for that matter even expensive parts for. So sick of hunting for spares I decided to keep my eye out for a new bike. Fortunately I've also now done enough miles to know what things I personally need a bike to have.

Reliable solid engine.
Cheap plentiful supply of secondhand parts.
Electric start.
Economical 50ish mpg.
Decent acceleration.
Decent turning circle.
More top-end than I will ever want.
Twin Cylinder, I only like twins or singles it's just my thing.
and a steel frame/swingarm so I can weld things to it if the need arises.

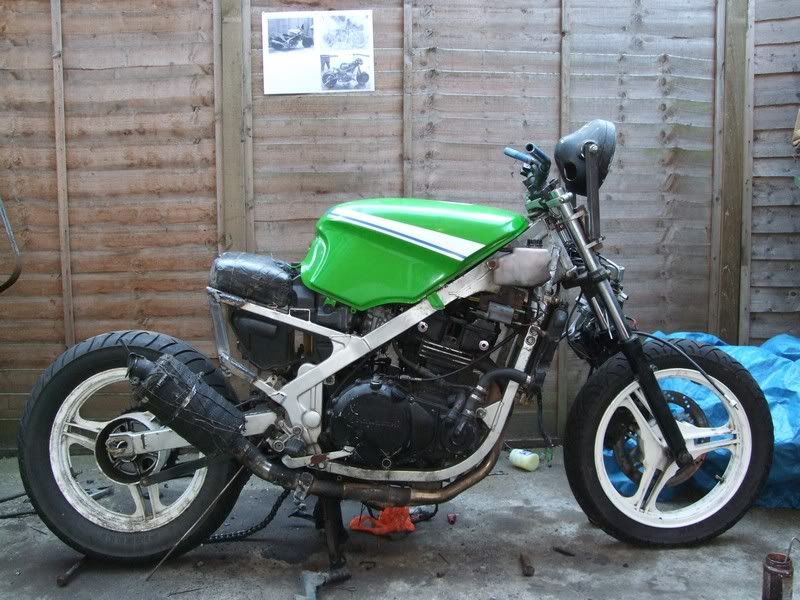
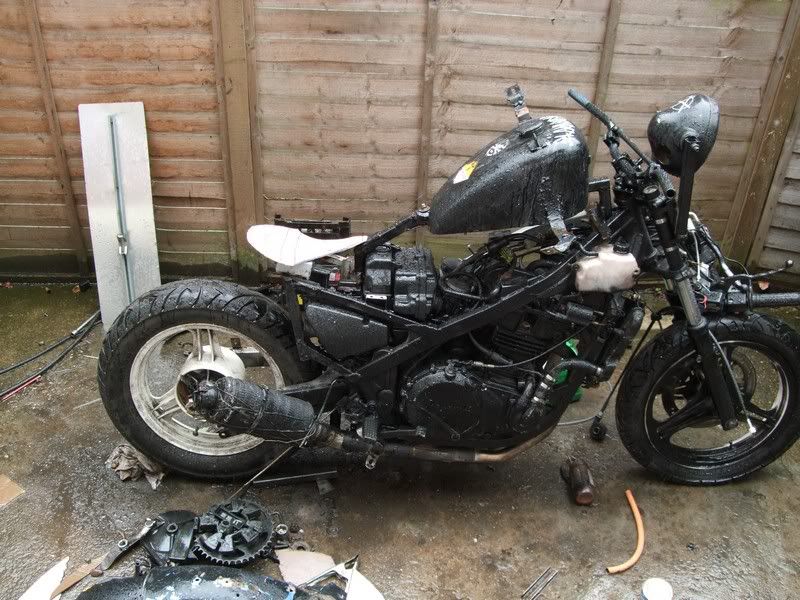
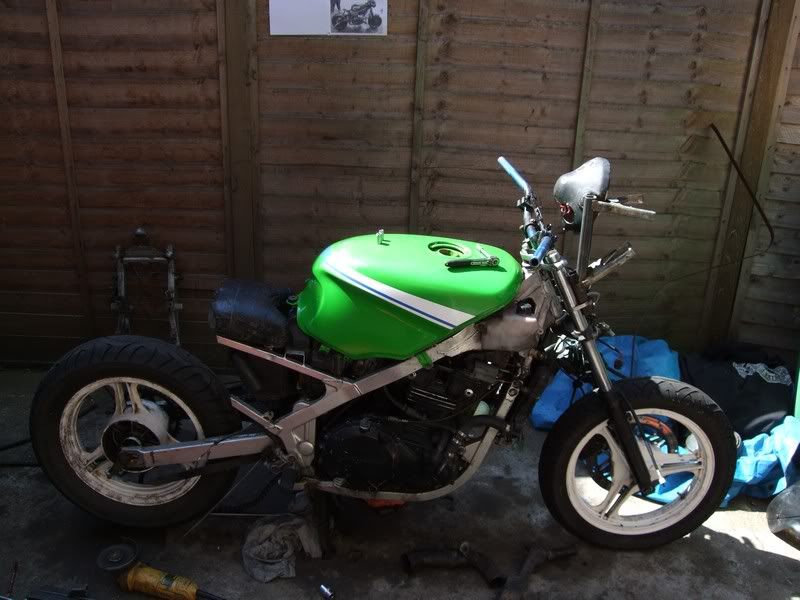
Having spoken to a good ammount of experienced people I realised a GPZ500 ticked most of these boxes. So when one came up on Ebay for peanuts I snapped it up :)

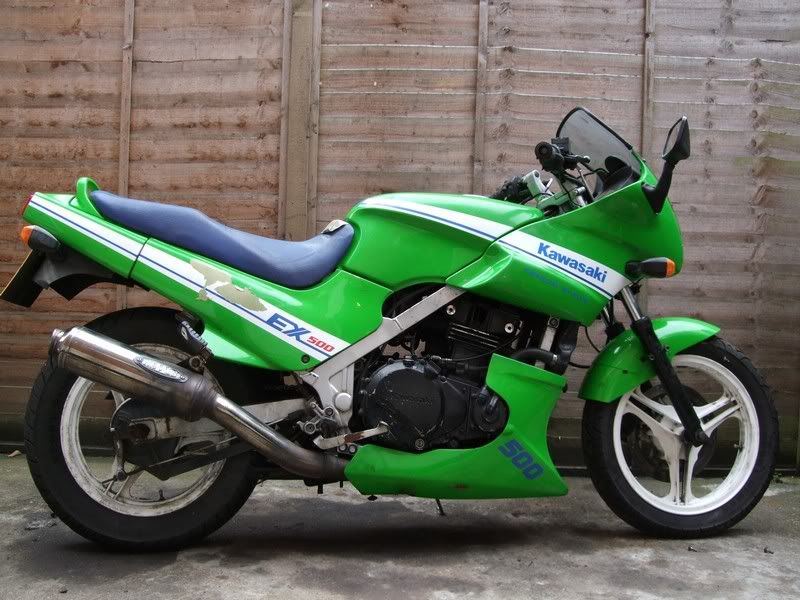
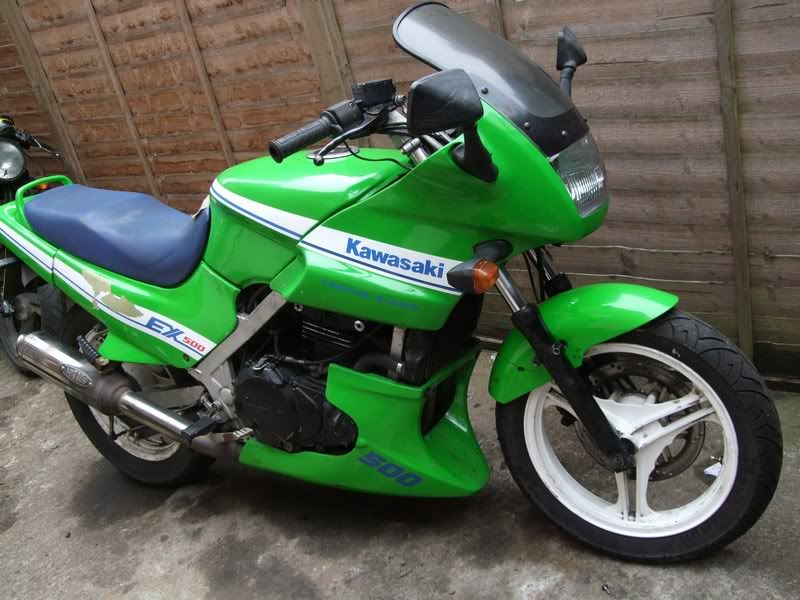
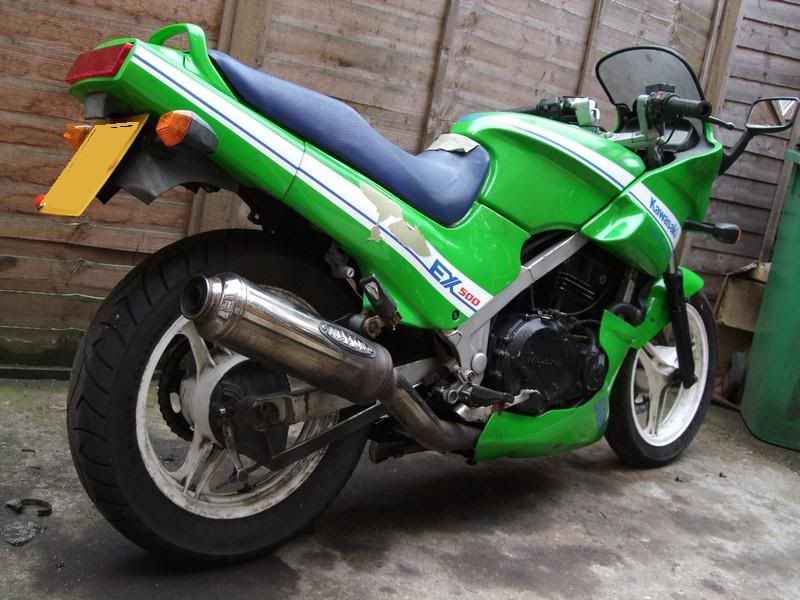
And here it is, a 1988 lime green example.

http://i245.photobucket.com/albums/gg50 ... CF4636.jpg
Afbeelding

http://i245.photobucket.com/albums/gg50 ... CF4637.jpg
Afbeelding

http://i245.photobucket.com/albums/gg50 ... CF4640.jpg
Afbeelding

Not only was it extremely cheap but it also came with some nice freebies:
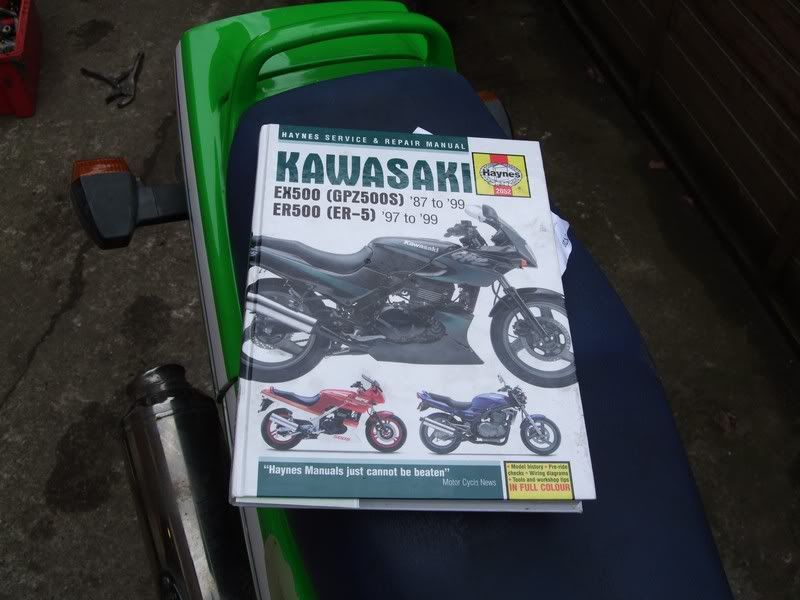
Haynes book'o'lies:
http://i245.photobucket.com/albums/gg50 ... CF4643.jpg
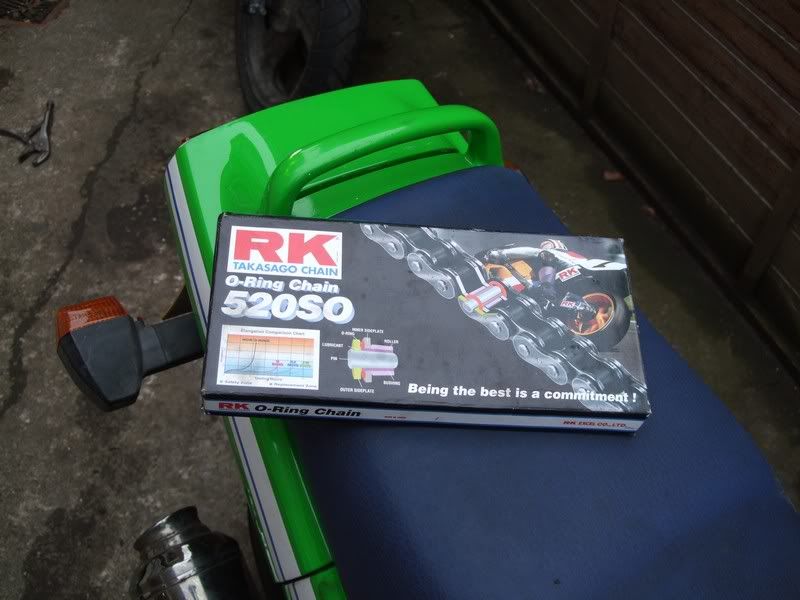
Afbeelding

Brand new chain:
http://i245.photobucket.com/albums/gg50 ... CF4644.jpg
Afbeelding

Brand New Sprocket:
http://i245.photobucket.com/albums/gg50 ... CF4645.jpg
Afbeelding

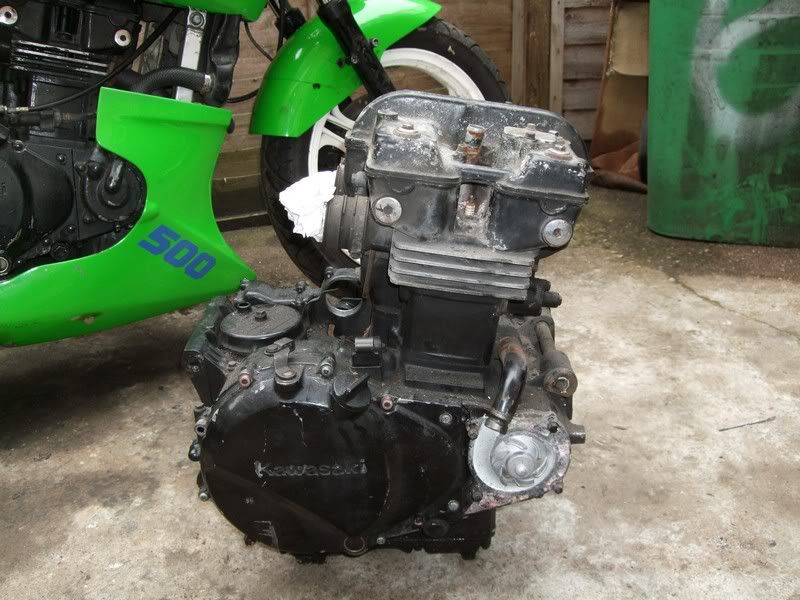
And a spare engine too:
http://i245.photobucket.com/albums/gg50 ... CF4646.jpg
Afbeelding

RIGHT THEN FIRST THINGS FIRST:

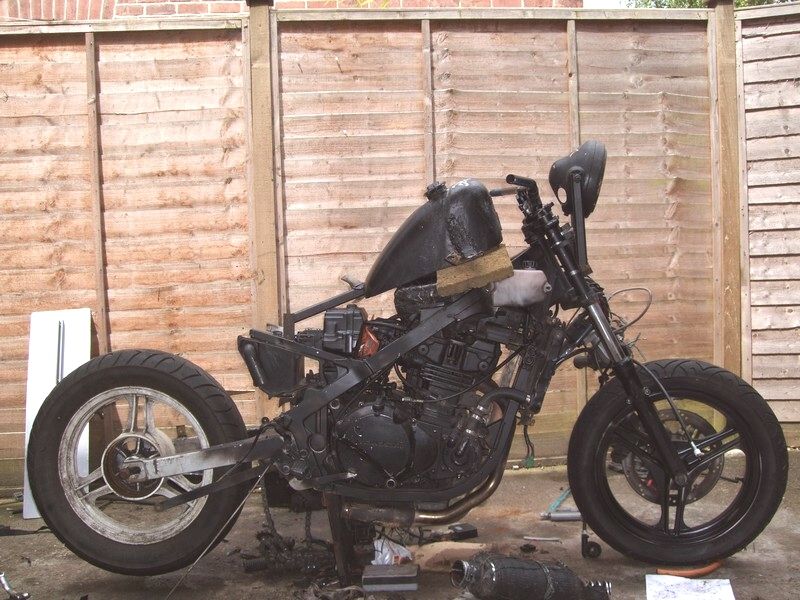
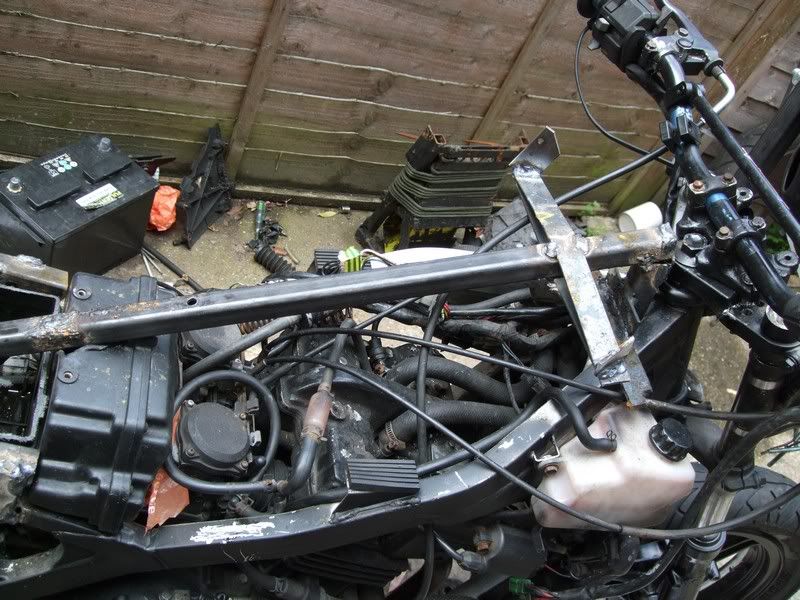
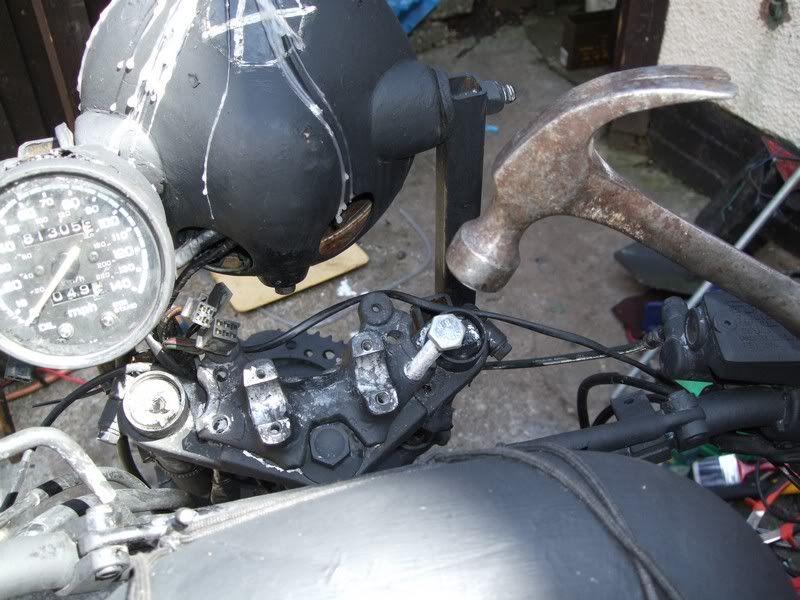
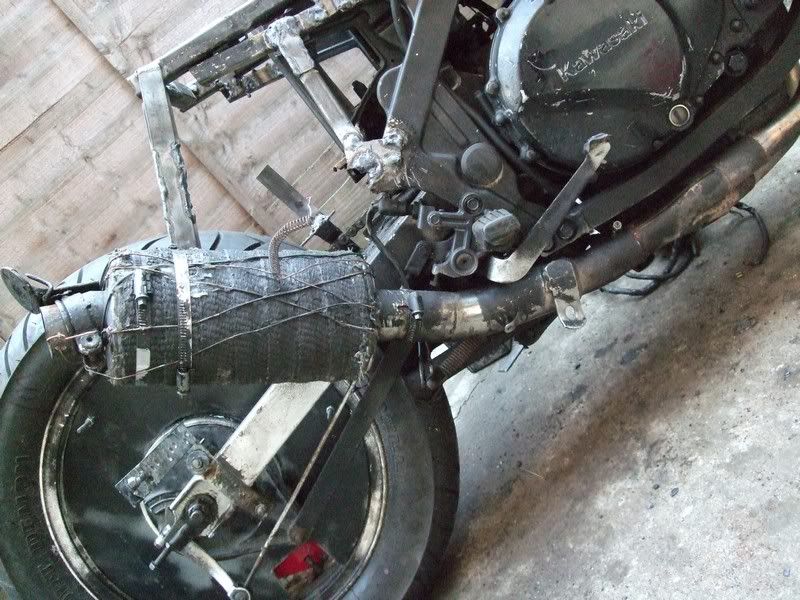
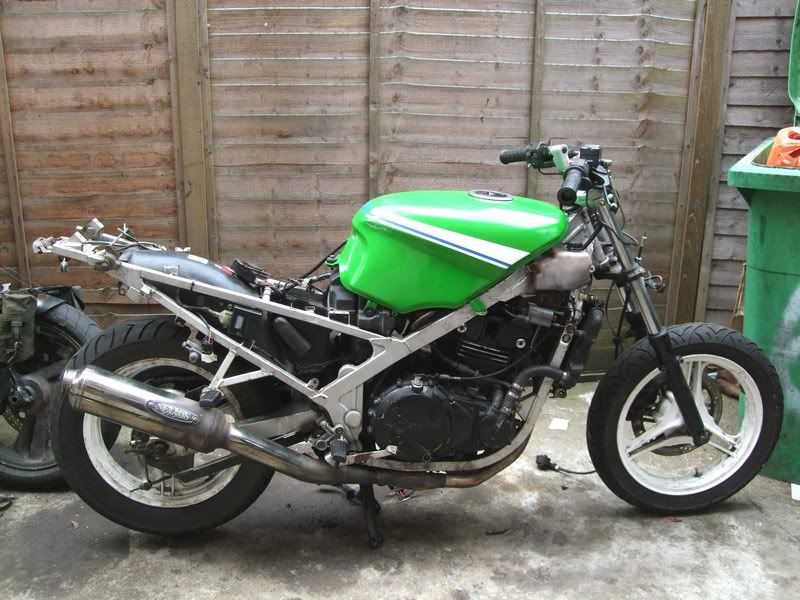
First to go would be the panels, they serve no useful purpose and the fairing weighs as much as a pair of wheels with the tyres on :o

http://i245.photobucket.com/albums/gg50 ... CF4676.jpg
Afbeelding

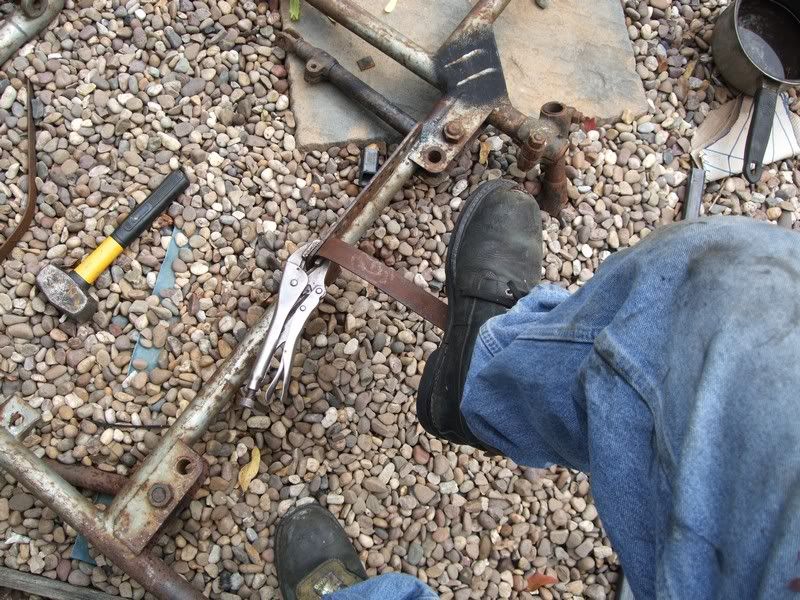
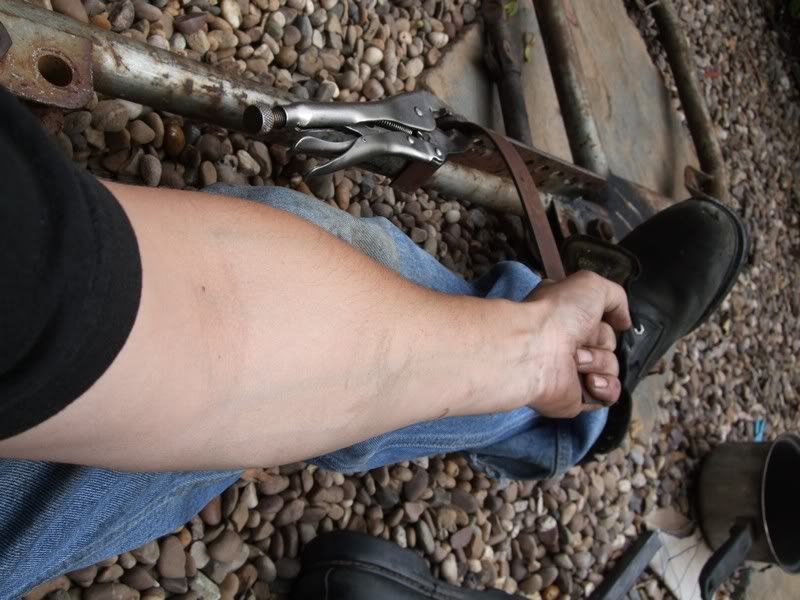
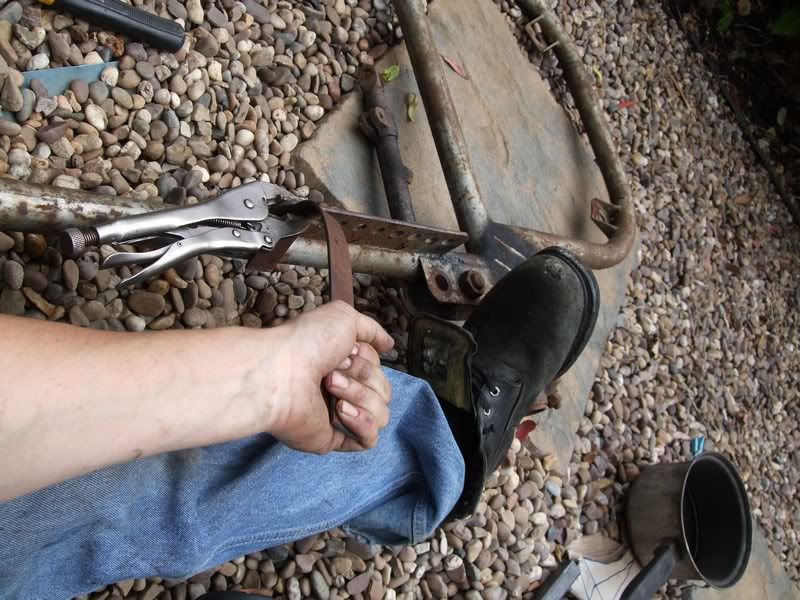
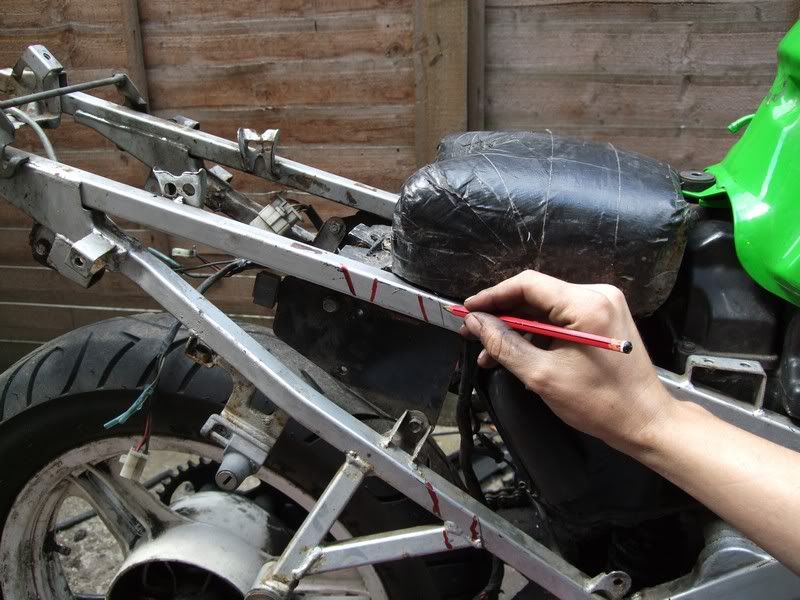
Then it was a case of determining what frame modifications I would need to do. This was a case of putting the camera on a 10sec timer then running round and holding the new seat at the desired height/position, whilst trying to look as gormless as possible (an art which I have perfected rather well):
http://i245.photobucket.com/albums/gg50 ... CF4716.jpg
Afbeelding

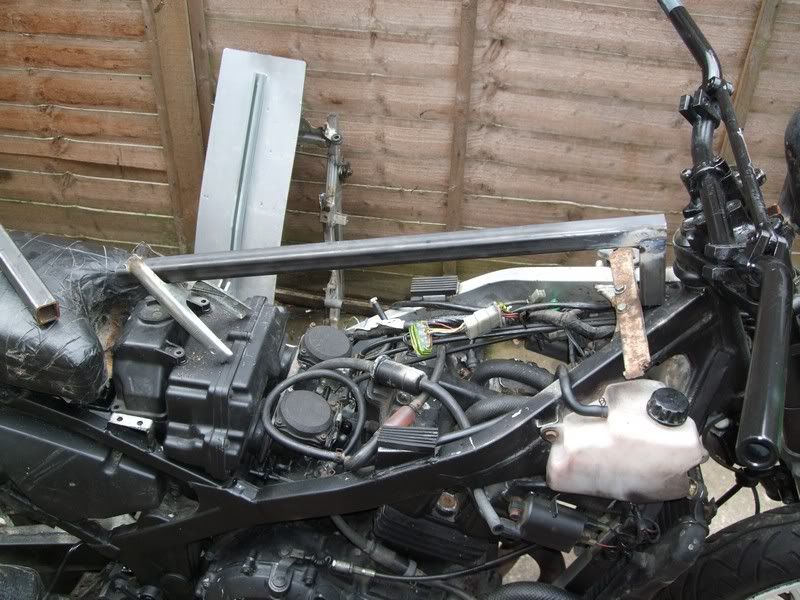
With an idea if where the seat was going to I marked the subframe each side:
http://i245.photobucket.com/albums/gg50 ... CF4718.jpg
Afbeelding

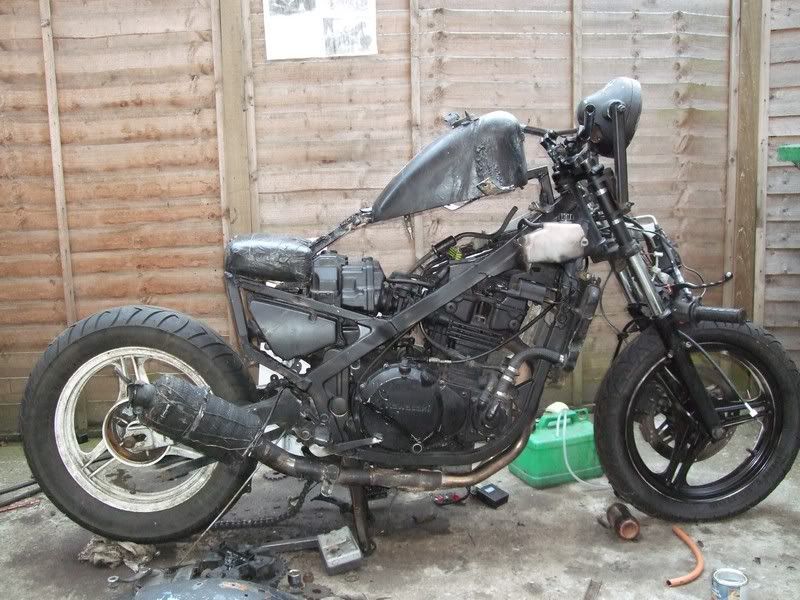
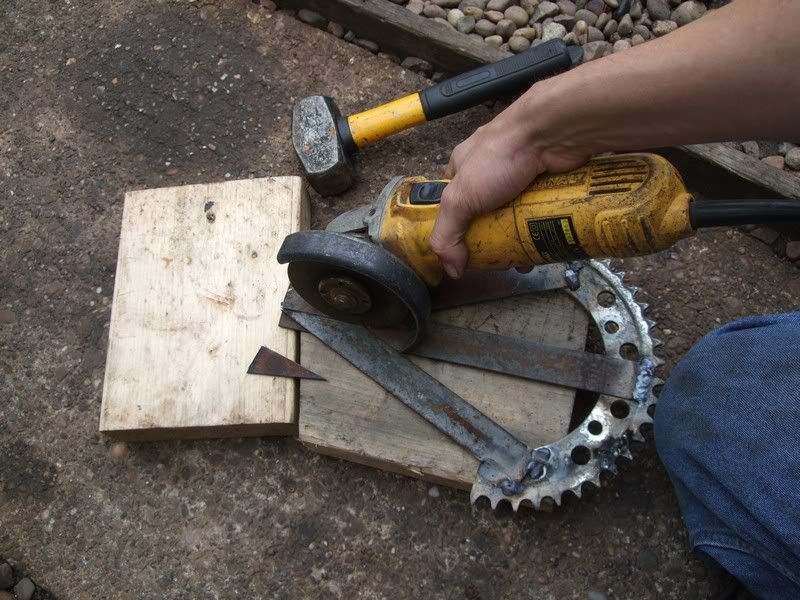
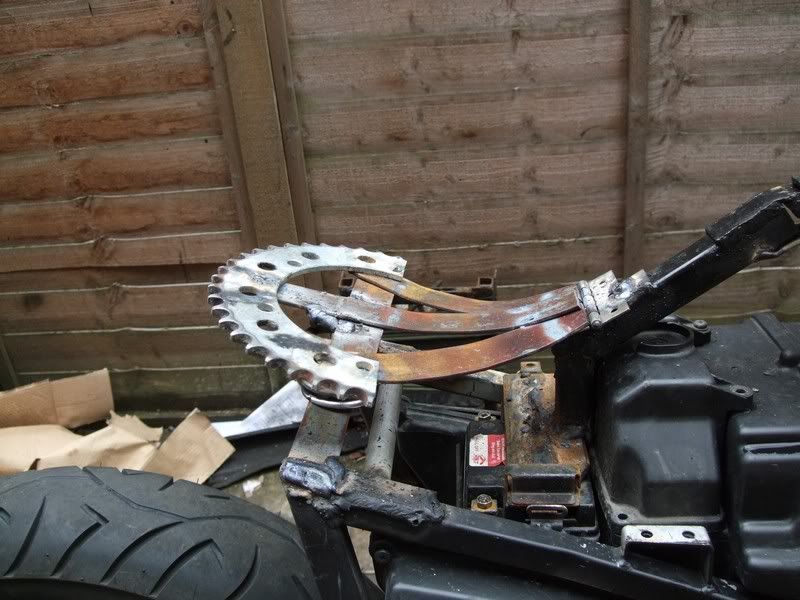
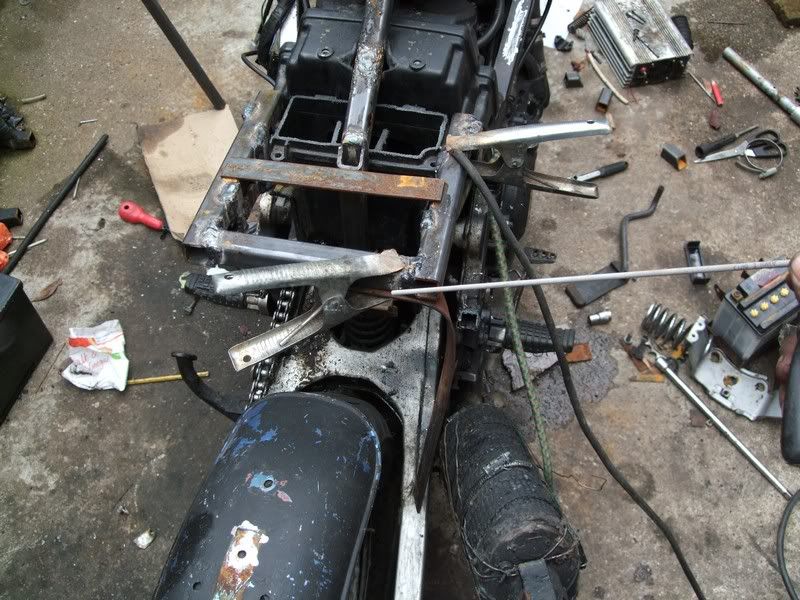
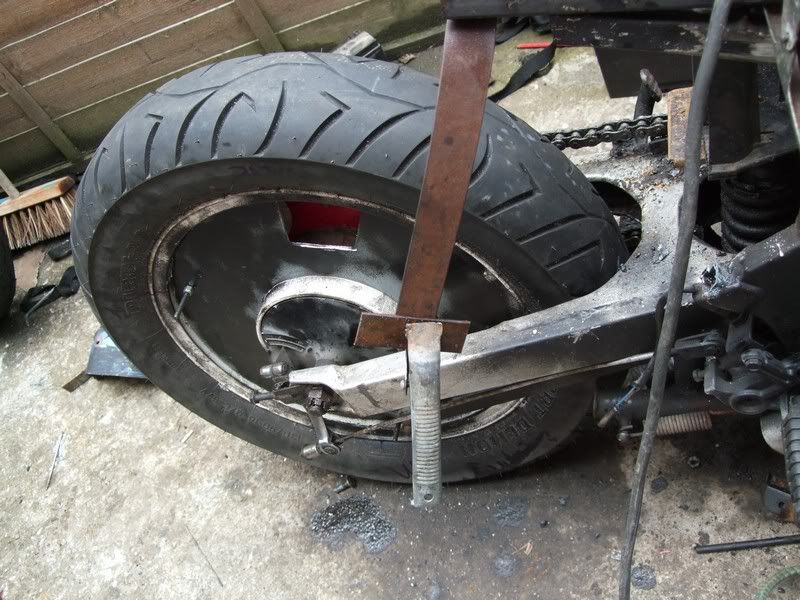
And then got on with my favorite part! CHOPPING THE ARSE OFF IT!

YOUTUBE VIDEO
http://www.youtube.com/watch?v=rxEyY6UJm-c

Sorted:
http://i245.photobucket.com/albums/gg50 ... CF4731.jpg
Afbeelding

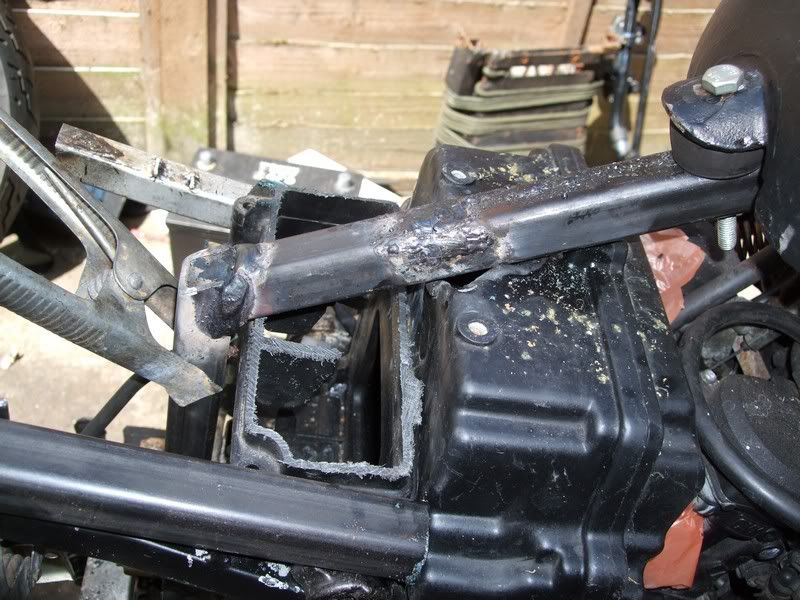
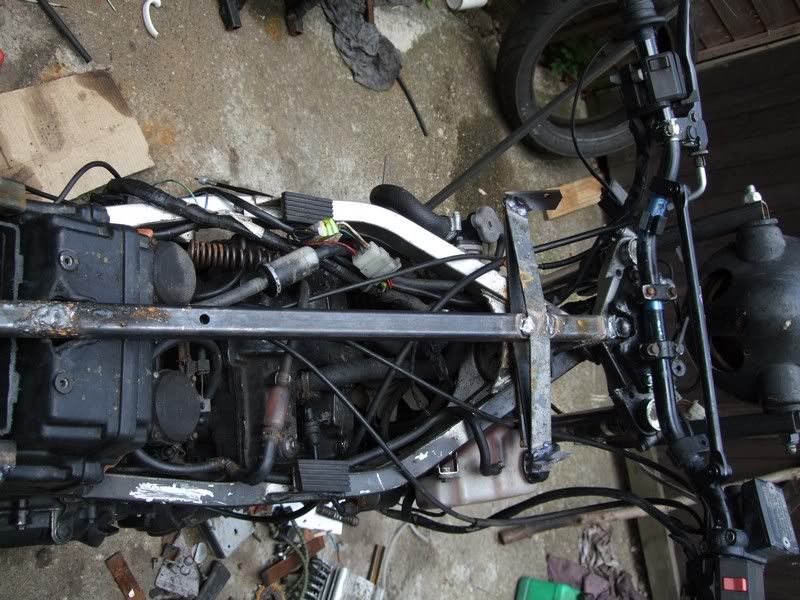
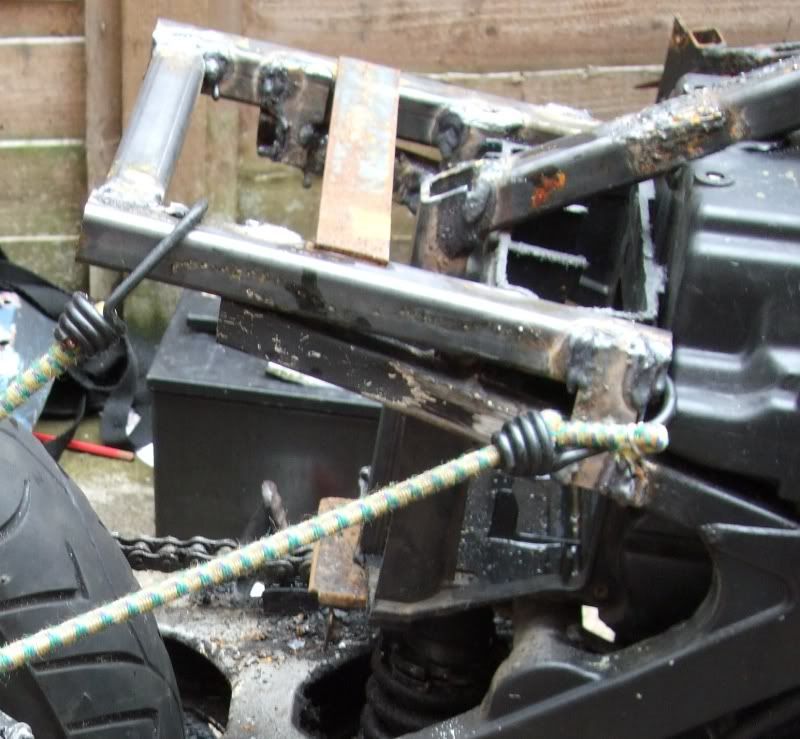
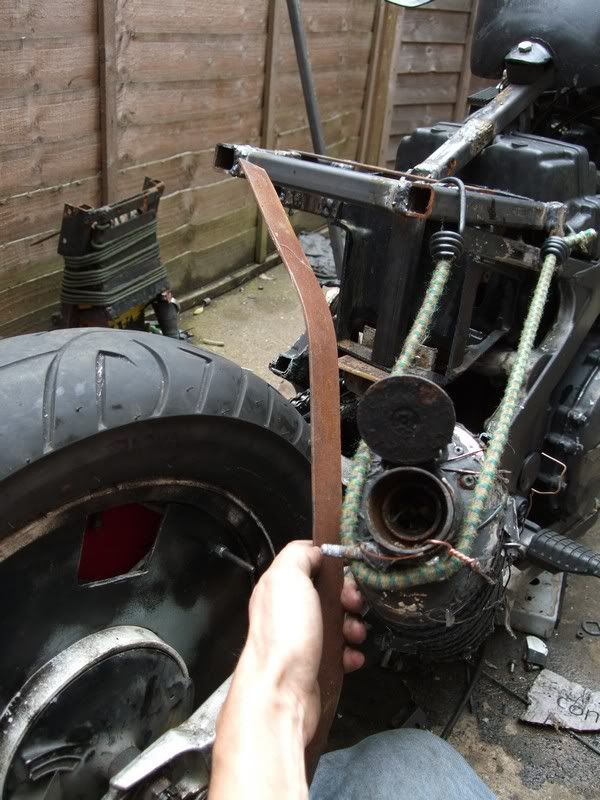
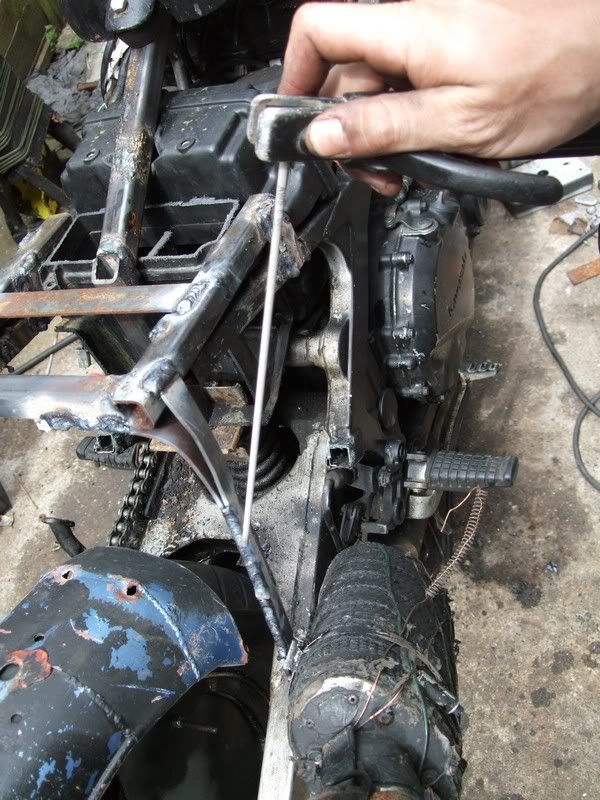
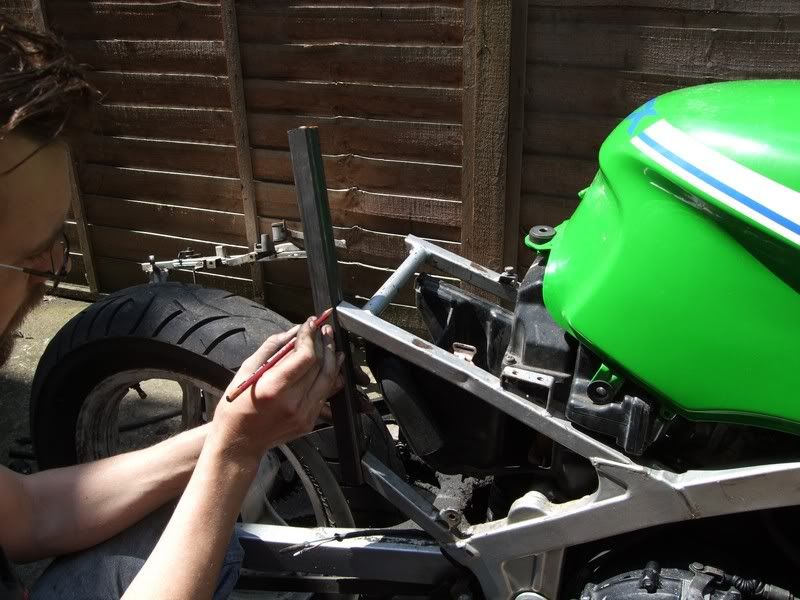
With that done it was time to re-inforce what was left with a couple'o bits of bar:
http://i245.photobucket.com/albums/gg50 ... CF4726.jpg
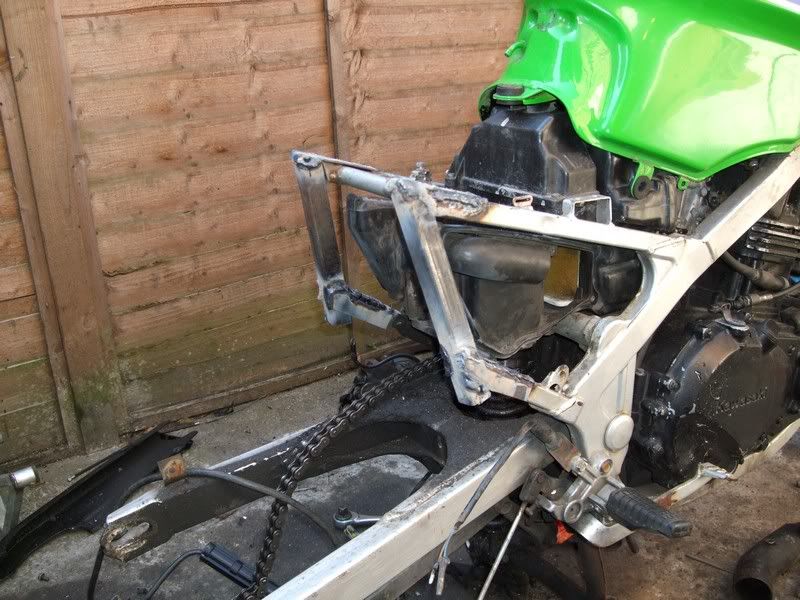
Afbeelding

Sorted:
http://i245.photobucket.com/albums/gg50 ... CF4736.jpg
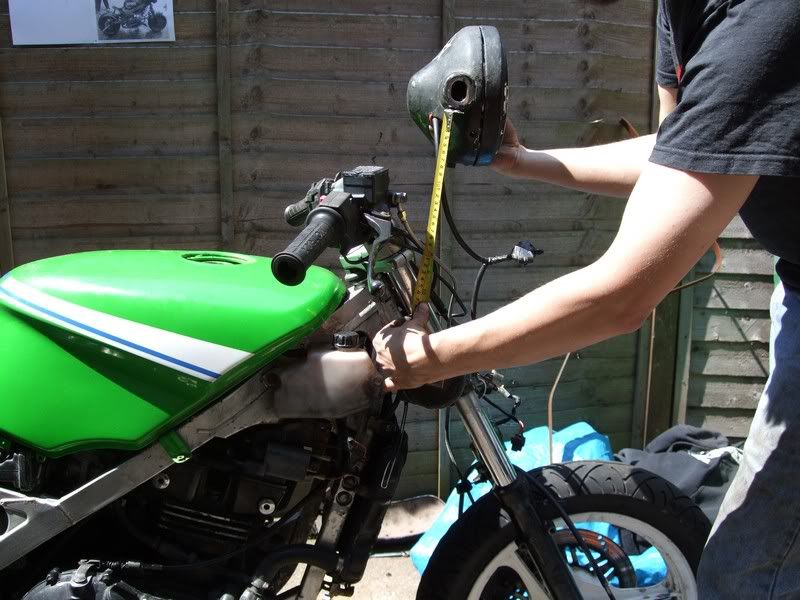
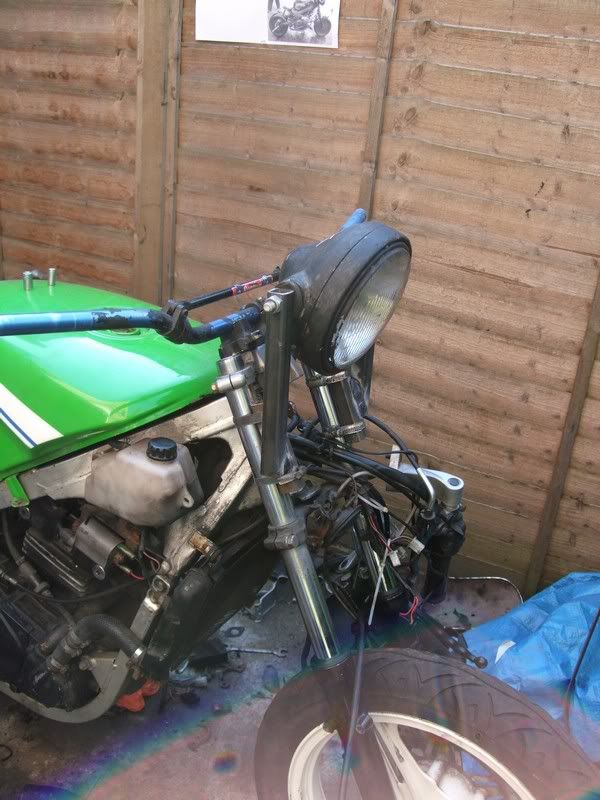
Afbeelding

HEADLIGHT

Fortunately I had a spare 8" lamp laying around in the yard, I know everyone's fitting tiny lights or fitting them in weird places where they don't work for sh#t, which is fine if you don't ride at night but I do so I want decent illumination. With the lamp in hand it was just a case of knocking up some brackets. This time I wanted the headlamp to be unusually high as I figured it'd compliment the lines of the bike and I've oftern read that high-mounted lights illuminate the road better.

First thing was to work out where exactly I wanted it to go, back to putting the camera on a timer!

Looks about right:
http://i245.photobucket.com/albums/gg50 ... CF4729.jpg
Afbeelding

Then chop a bit of bar the right length.
http://i245.photobucket.com/albums/gg50 ... CF4730.jpg
Afbeelding

Then to clip it in place for one last look before the brackets are made, very nice:
http://i245.photobucket.com/albums/gg50 ... CF4731.jpg
Afbeelding

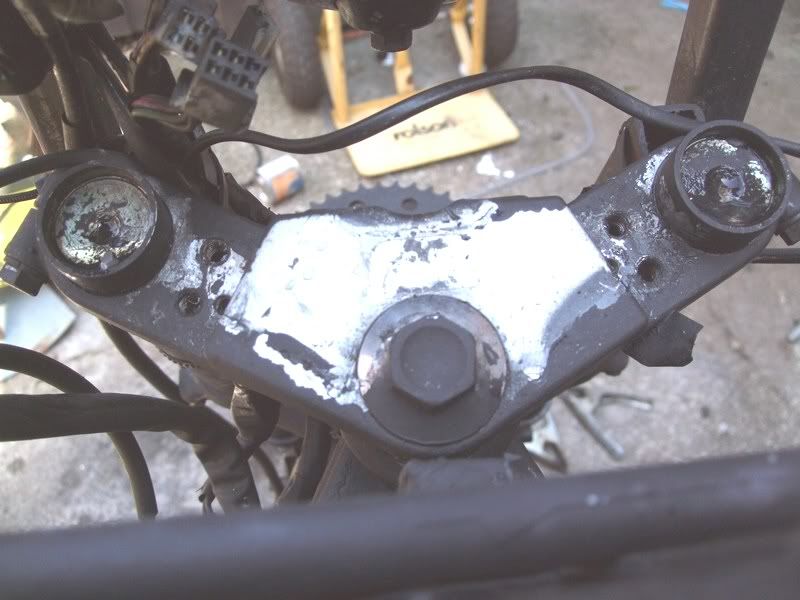
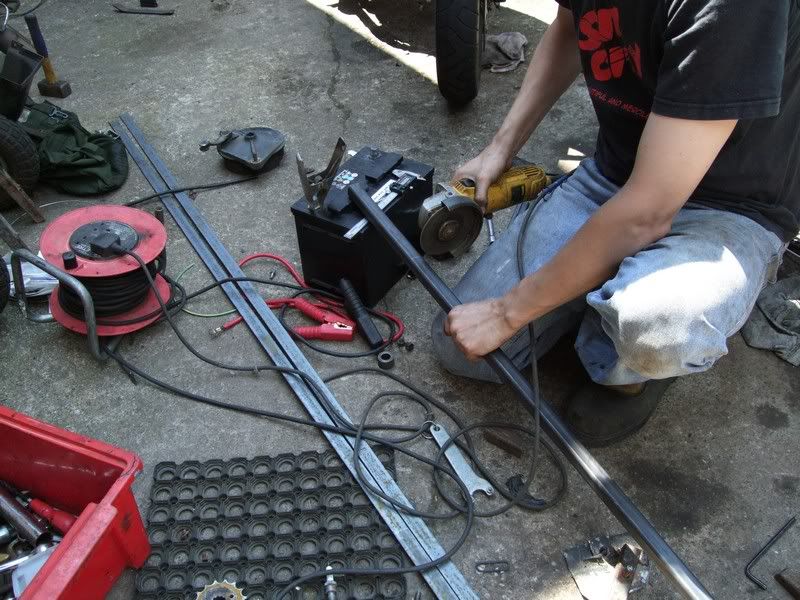
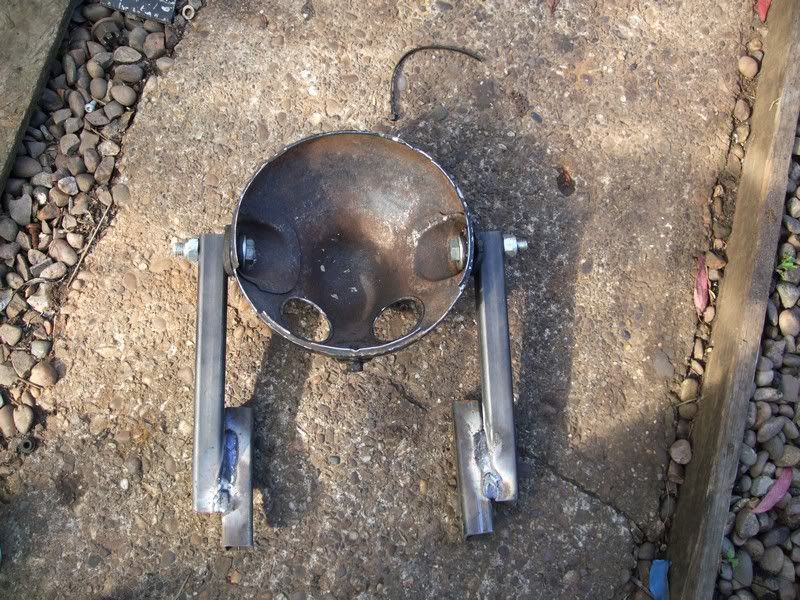
The brackets will be made from 1" box section for two reasons, because I hang luggage on the front of my bike quite often so I want them strong and because I already have some 1" box section and I'm too lazy to go and buy anything else:
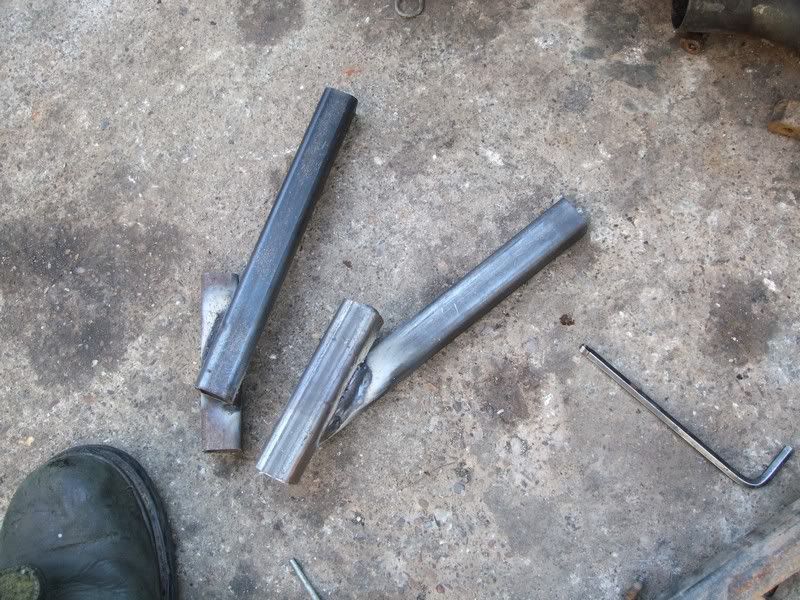
They're a very simple design, 2 peices of bar with a short bit welded to the bottom to attach to the forks with hoseclips:
http://i245.photobucket.com/albums/gg50 ... CF4734.jpg
Afbeelding

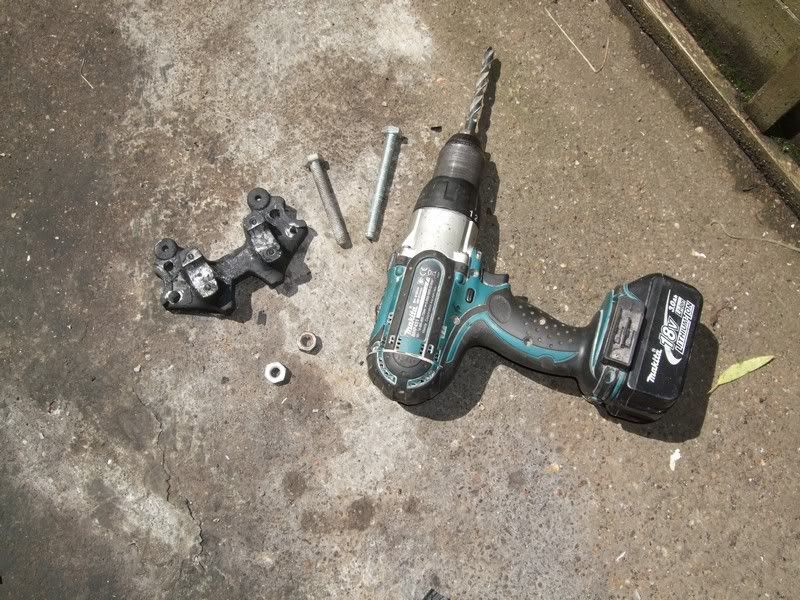
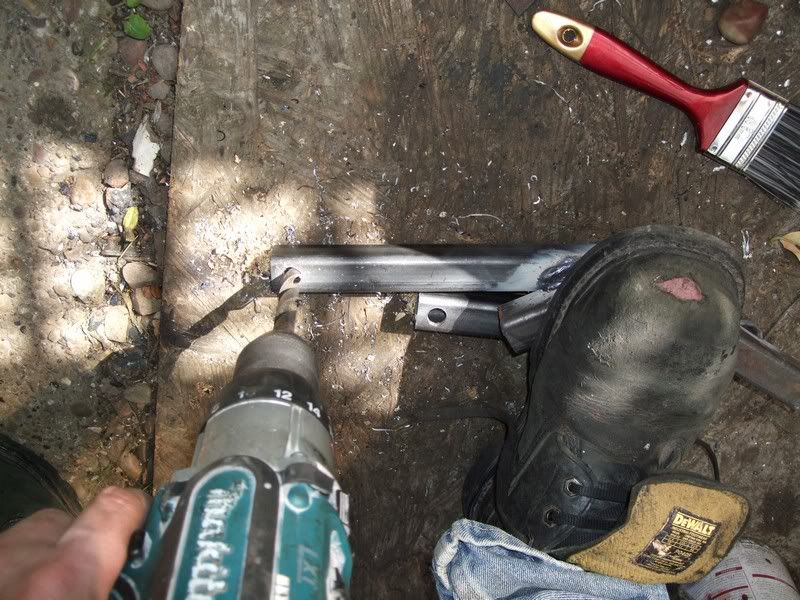
I then drill a nice big hole in the top of each one:
http://i245.photobucket.com/albums/gg50 ... CF4743.jpg
Afbeelding

And bolt them to the headlamp shell:
http://i245.photobucket.com/albums/gg50 ... CF4744.jpg
Afbeelding

And fix the whole mess to the forks with four hose clips, sorted, and very strong indeed:
http://i245.photobucket.com/albums/gg50 ... CF4747.jpg
Afbeelding

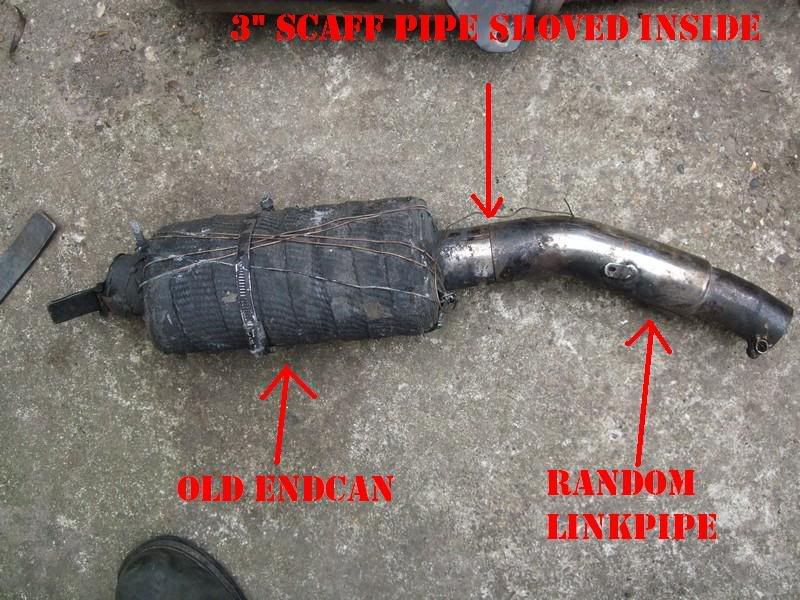
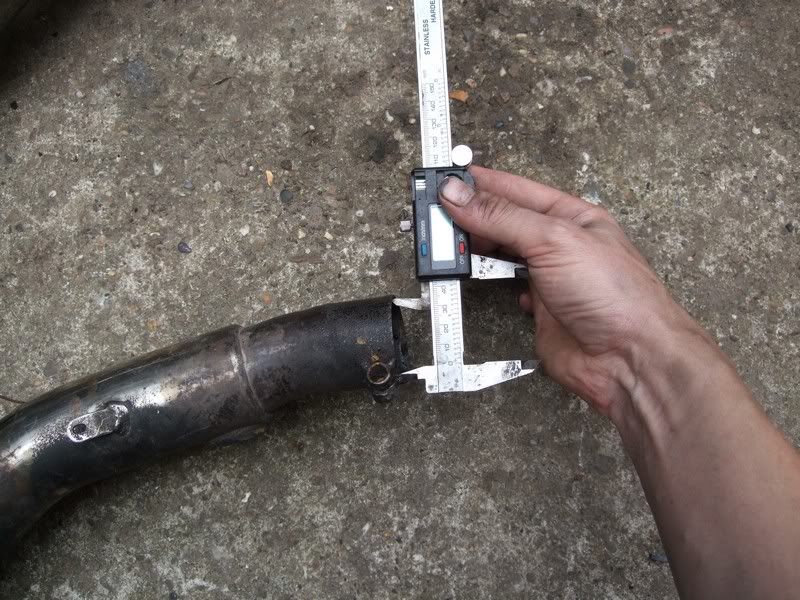
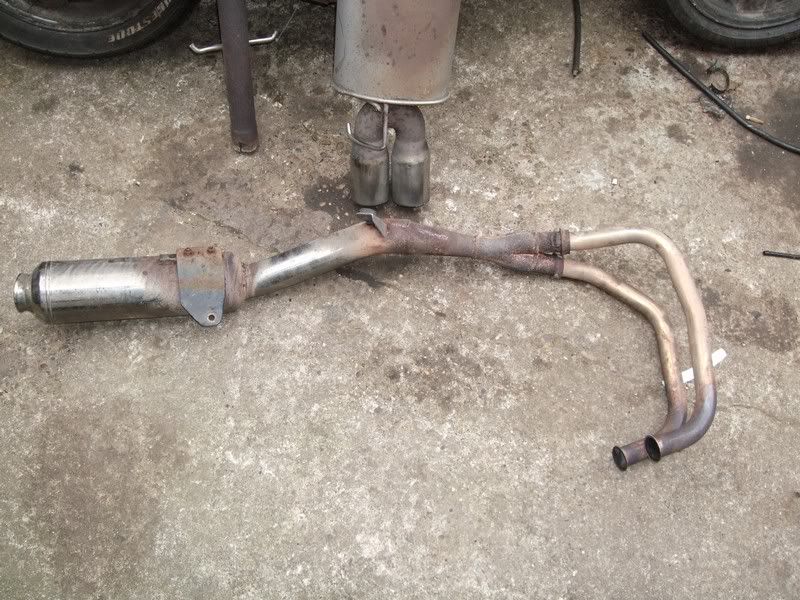
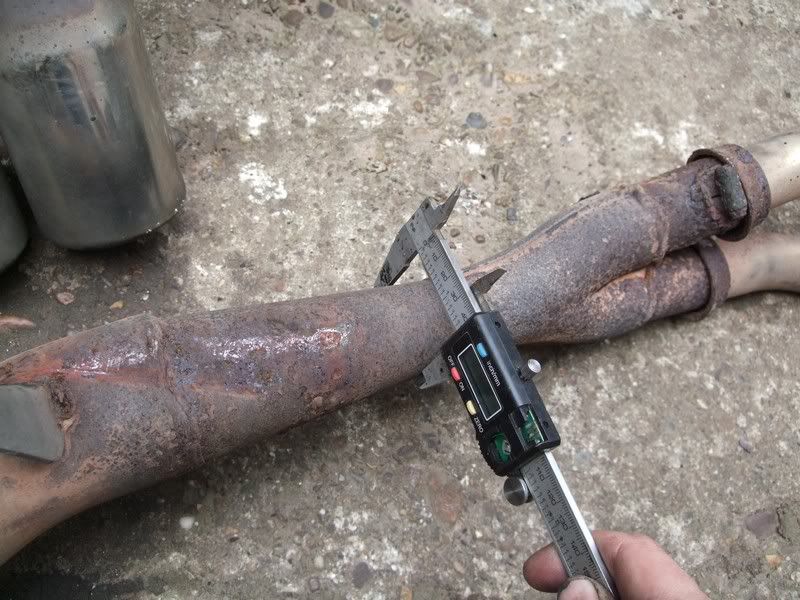
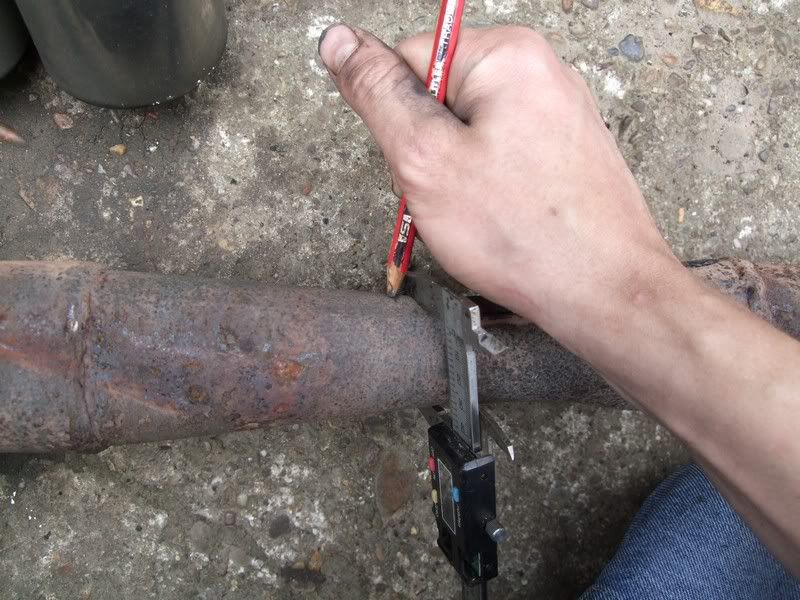
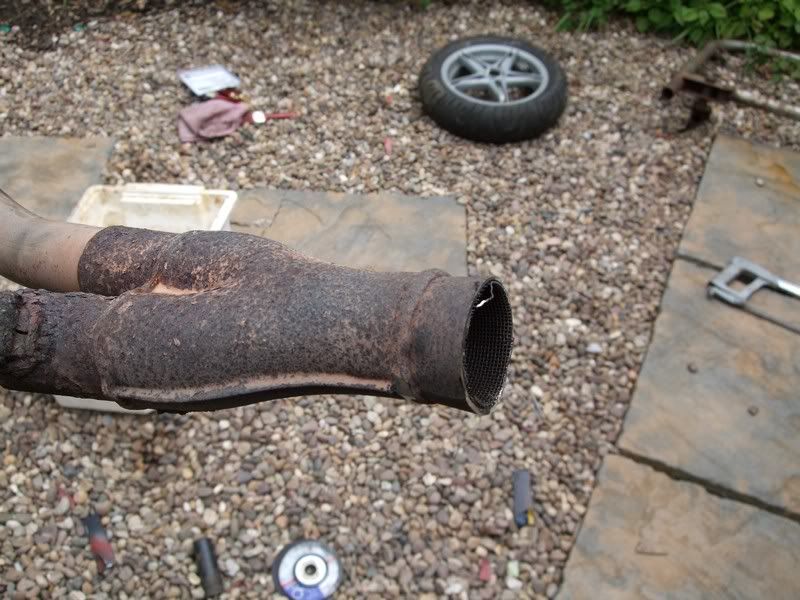
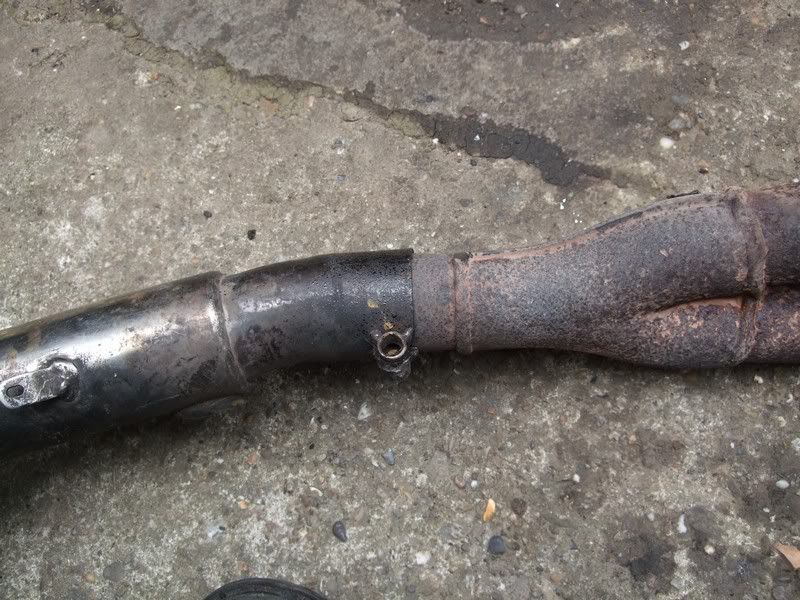
OK so far so good, Part 2 coming soon where we crack on with a new exhaust :)
Laatst gewijzigd door RatBikerNate op di jul 21, 2009 2:19 pm, 3 keer totaal gewijzigd.

Gebruikersavatar
Goos
Bestuur Rat
Bestuur Rat
Berichten: 4422
Lid geworden op: ma sep 18, 2006 11:27 pm
Locatie: Ge kunt de groeten uit Brabant krijgen ...
Contacteer:

Bericht door Goos » do jul 16, 2009 12:20 pm

So far ... nice job Nate! :D
Druk, druk, druk, vroem vroem, druk, druk, druk, .....

Gebruikersavatar
Woody
Bestuur Rat
Bestuur Rat
Berichten: 5200
Lid geworden op: di sep 19, 2006 10:12 pm
Locatie: Purremereutel

Bericht door Woody » do jul 16, 2009 12:34 pm

Hi Nate, the 500 engines are quite good, only have one downside: when the starter motor fails, you have take the engine apart to get to it.
And what I've heard is it almost impossible not to leak any cooling liquid into the engine when adjusting the valves.
Furthermore nice engines. My brother has one and managed to ride to Faro and back with only minor problems.
Good thing you have the manual.
I see you managed to change the handlebars as well? Looking forward to see further progress on this project.
Geen beter seizoen dan het knutselseizoen...totdat er weer gereden gaat worden!

Gebruikersavatar
magna
Rataplan Rat
Rataplan Rat
Berichten: 7192
Lid geworden op: do dec 21, 2006 11:30 pm
Locatie: land van maas en waal
Contacteer:

Bericht door magna » do jul 16, 2009 8:14 pm

Hi Nate, Nice choice.
But for a Non-UKer, what's a F-plate???
Op het toilet: (>_<) - (¤_¤) - (0_0) - (^_^)

Gebruikersavatar
RatBikerNate
Bezoek Rat
Bezoek Rat
Berichten: 7
Lid geworden op: vr mei 23, 2008 2:13 pm

Bericht door RatBikerNate » vr jul 17, 2009 10:07 am

PART 2

You lucky people, it's chucking it down outside today so I have time to do part 2 already.

So lets crack on with it............

Exhaust

The bike came with a Nexxus exhaust, a nice exhaust but it was broken inside and rattled really loud, you can hear it in this video at 00:40 sec.

http://www.youtube.com/watch?v=sjAy8O4TeuI

Needless to say it was already driving me insane!, and also needless to say I am too lazy to fix it properly.Fixing it 'properly' would have meant opening up the can, locating the fault working out a way to fix it, fixing it and welding the whole mess back together.

Much easier to just sling it and bodge something up.

Step 1, find an old f#cked endcan, a random link pipe and a 3" bit of scaffold pipe to connect them together with in my junk heap.

Afbeelding

Then measure the size of the inlet on the link pipe:
Afbeelding

Then having removed the old exhaust:
Afbeelding

Simply measured it to find where the diameter was the same as the link pipe:
Afbeelding

Marked it:
Afbeelding

And lobbed it off with the grinder:
Afbeelding
Afbeelding

And finally shoved the linkpipe on the end, sorted, a nice new exhaust:
Afbeelding

Time to shove it on the bike, and check out the progress:
Afbeelding

I hate it!, it's not the exhaust it's something else....the tank....time to ditch it for something else.

If I've learned anything over the last few years of modding bikes it's that the true awesome mods will completely take you by supprise. So when I hit a point where I can't figure out what to do next I start trying totally random stuff, particularly things that I think would no-way look right in a million years.

And you know what it usually pays off! and this time was no exception. The only tanks I had were ones that I figured would terrible on this bike. So I started chucking them on the bike, a cb250rs tank looked awful, a cd125 tank was close but not quite right, even a 10l jerry-can got thrown on there. Then as a last ditch effort I took the king sportster tank off my old bike "the grabenratte".

And f#ck me it worked! with an old bit of sponge and a bike seat shoved under it for the height it suddenly looked 'right'......in a weird hunch-back kinda way. I loved it.

Afbeelding

So all I had to do now was to knock up a frame to hold it in that position, hmmmmmm time for more 1" box section and some old bits of scrap.

Simple really, just a straight length of bar with a vertical bar at each end.
Afbeelding

Unfortunately the airbox was in the way, having been advised to never get rid of the airbox on a GPZ500 I instead just modified it a little, simply by heating the box section with a welder and letting it melt the box into shape.
Afbeelding

After that I just added a crucifix to it to support the tank:
Afbeelding

Afbeelding

And shoved the tank on, nice:
Afbeelding


That's it for today! more tommorow where we make a start on the springer seat, if I get the chance!

Ratty
Laatst gewijzigd door RatBikerNate op vr jul 17, 2009 10:39 am, 2 keer totaal gewijzigd.

Gebruikersavatar
RatBikerNate
Bezoek Rat
Bezoek Rat
Berichten: 7
Lid geworden op: vr mei 23, 2008 2:13 pm

Bericht door RatBikerNate » vr jul 17, 2009 10:13 am

Woody schreef: I see you managed to change the handlebars as well? Looking forward to see further progress on this project.
Yeah the handlebars are really easy, I just get the top yoke from another bike that usues normal bars and bolt it on top. It will be explained in part 3 :)
magna schreef:Hi Nate, Nice choice.
But for a Non-UKer, what's a F-plate???
Sorry Magna!, I've changed it to be international-friendly :)

Just means it's a 1988 bike

THAT REMINDS ME!

If anyone does not understand any of my British 'slang' please let me know and I will change it or explain it for you :)

scheffers
Bezoek Rat
Bezoek Rat
Berichten: 85
Lid geworden op: wo sep 03, 2008 10:49 pm

Bericht door scheffers » vr jul 17, 2009 1:35 pm

jeah it's a real ugly motherf! i like it!
Op zoek naar CAD-tekenaar of Designer? roelscheffers.nl

Mars
Bezoek Rat
Bezoek Rat
Berichten: 330
Lid geworden op: zo feb 25, 2007 10:25 am
Locatie: Bocholtz

Bericht door Mars » vr jul 17, 2009 2:47 pm

Looks awful....great work.


Gr Mars
Greetz ut Limbabwe

Gebruikersavatar
Dyrck
Rataplan Rat
Rataplan Rat
Berichten: 3946
Lid geworden op: di sep 19, 2006 3:33 pm
Locatie: Op de zeebodem

Bericht door Dyrck » vr jul 17, 2009 7:41 pm

Lookin' great Nate!
Keep us informed en keep up the good work :-=
Olive is the New Black

der obergefreiter
Bezoek Rat
Bezoek Rat
Berichten: 2583
Lid geworden op: wo feb 14, 2007 3:43 pm

Bericht door der obergefreiter » vr jul 17, 2009 8:51 pm

somebody oughta lock your tools away
camperproleet

Redpigeon
Bezoek Rat
Bezoek Rat
Berichten: 2892
Lid geworden op: di sep 19, 2006 2:14 pm
Locatie: ergens langs de Rijn

Bericht door Redpigeon » vr jul 17, 2009 8:53 pm

That project looks very good, i'll like to see it in real :wink: :-** :-/ :-=
gespannfahrer

Gebruikersavatar
fasteddie
Bezoek Rat
Bezoek Rat
Berichten: 1055
Lid geworden op: di sep 19, 2006 8:22 am

Bericht door fasteddie » za jul 18, 2009 12:09 pm

Nice!!!!!

I like the explaining-foto's :lol: :D
Groeten Eline-fasteddie.

Gebruikersavatar
magna
Rataplan Rat
Rataplan Rat
Berichten: 7192
Lid geworden op: do dec 21, 2006 11:30 pm
Locatie: land van maas en waal
Contacteer:

Bericht door magna » za jul 18, 2009 12:25 pm

I think your Electrylosis-videos are brilliant. :-**
One word of the wise, do this never ever ever in a poorly ventilated place. the gasses which come of the water are kinda eeeeeeeeeeh, wel sorta very explosive :lol: :lol: :lol: :lol:
Op het toilet: (>_<) - (¤_¤) - (0_0) - (^_^)

Gebruikersavatar
RatBikerNate
Bezoek Rat
Bezoek Rat
Berichten: 7
Lid geworden op: vr mei 23, 2008 2:13 pm

Bericht door RatBikerNate » zo jul 19, 2009 3:09 pm

PART 3

Well I was going to kick-off this part with the springer seat, but I've had a dozen PM's all wanting to know how I did the bar conversion for free, so lets start with that........

Bar conversion
Right then 'ere we go, below is the original top yoke designed to take kawasaki's weird OEM bars which are too narrow, too high, at a horrible angle and totally non-adjustable. Time for some regular bars.

Afbeelding

Here's all the stuff for the conversion, 2 decent size bolts, a drill and an old top yoke from a bike that takes regular bars.

Afbeelding

First I took the old yoke and trimmed it to fit by cutting the ends off:
Afbeelding

and then cut a large peice out of the bottom so it will fit around the kawasaki's head-bolt.
Afbeelding

After that I drilled a hole in each end for the bolt.
Afbeelding

Afbeelding

To mark the drill points on the kawasaki's top yoke I simply put the new yoke on top, dropped a bolt in, eye-balled it straight and then gave the bolt a good hard clout with the hammer, then shoved the bolt in the other hole and hit it again.
Afbeelding

With the holes marked it was just a case of drilling them:
Afbeelding

And bolting the whole mess together, sorted, regular bars for no cash.
Afbeelding
Afbeelding

Springer seat

Ok so this seat did not make it onto the finished bike but I've decided to include it in the build blog because it is quite nice. In the end it just didn't suit this particular bike which is a damn shame really :(

Having thought about various ways of making the seat-base I decided I wanted something a bit different. I wanted it to be sort of bicycle seat shaped a quick rummage in the shed and things started to come together.

The first thing that seemed good was an old sprocket for a bike I no longer own, I figured I could use some of it to give a rounded back edge to the seat. So before I start chopping anything up I would make a cardboard cut-out.

Firstly drawing round the sprocket:
Afbeelding
Afbeelding

Adding some lines which I would later make from 2mm flat bar.
Afbeelding

Having cut it out I tried it on the bike and was pleased with the shape and apperance:
Afbeelding

So the sprocket was lobbed in half.
Afbeelding

And some lengths of flatbar were cut to match the lines on the cardboard cut-out, I don't have a vice so instead I just mole-grip the metal to an old sidecar chassis I have in the garden.
Afbeelding
Afbeelding

Easy way to keep things square/ alignt stuff as to lay it out on a peice of square mesh with all the squares of equal size it makes eye-balling it really easy.
Afbeelding

Quick trim with the grinder and then curved it a bit.
Afbeelding

Then finally added a hinge to one end and half an old shock spring welded underneath to support it and give it the all important 'bounce'
Afbeelding

Looked nice and had a good bit of bounce but the hinge needed improving as the seat would bend side to side with little effort:

http://www.youtube.com/watch?v=EuW2Wy5n_Lc

But.......

This is me we're talking about, I work totally on instinct with little or no planning and I change my mind totally at random throughout any build. The following day I walked outside took one look at it and chopped it off, no idea why but it just wasn't right anymore :(

ANOTHER DAY, ANOTHER SUBFRAME

With the springer seat abandoned I decided to further shorten and simplify the subframe once again undoing some of my hard work. At the end of the day I love super-short subrfames and saw the arse off every bike I own, that's just my thing.

This ws how it looked after the first chop:
Afbeelding

With it chopped and the airbox cutdown I made a 1"x1" box section platform to hold the seat, the reasons for this were twofold. Firstly because I've learned that seats that lean forward are stupidly uncomfortable and secondly because I want to make a rack that will slot into the ends of the tubes.
Afbeelding

Exhaust mount
Exhaust mounts are really really easy to make with a bit of flat bar.

With the exhaust held in position with a bungee I had a rummage about and found a bit of flat that was about the right length.

Near enough
Afbeelding

Then clamped it to my workbench and added some bends with my special bending machine.

First a 90 degree
Afbeelding

Then a bit of diagonal so it will line up with the exhaust end can:
Afbeelding
Afbeelding

Then it's just a case of welding it to the subframe
Afbeelding

welding a T-Bar on the end for the hose-clip to go round
Afbeelding

and then adding a bit more flat for strength.
Afbeelding

Job's a goon'un
Afbeelding

Filled in wheels

The eagle-eyed amongst you may have noticed that the rear-wheel is now filled in. I've used all sorts of things to mekw wheel discs with varying degrees of sucsess. The last ones were made with bits cut from an estate agents sign and were ther easiest to make requiring only a pair of scissors. They were fine but the paint kept coming off and they went out of shape a bit. So this time I went with 3mm aluminium cut from a roadsign, very very hard to make costly in terms of time and cutting discs for the grinder but much better and they'll last forever.

And while I was at it took the time to fit all-new chain and sprockets :)
Afbeelding


AND THAT'S ALL FOR TODAY, more tommorow if the weather's still shite :)

rADt
Bezoek Rat
Bezoek Rat
Berichten: 3060
Lid geworden op: zo dec 24, 2006 5:03 pm
Locatie: 100% ZLD
Contacteer:

Bericht door rADt » di jul 21, 2009 7:50 am

Great bike.

In how many weeks have you built this creation?
Radt, Ratter, Ratst.

Plaats reactie